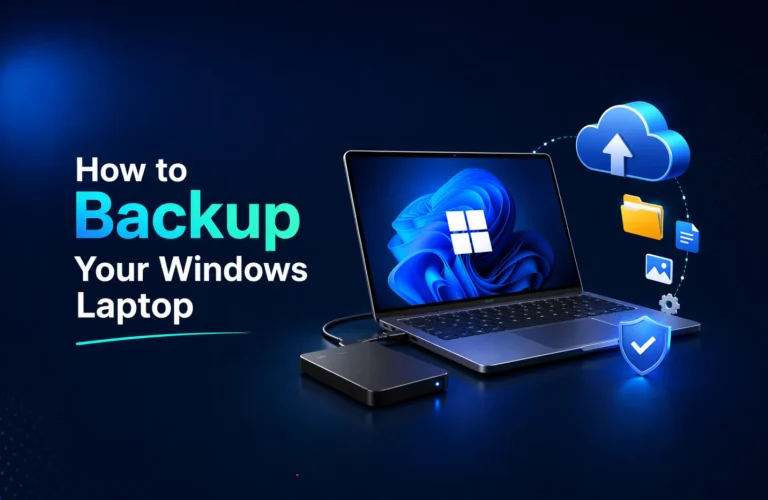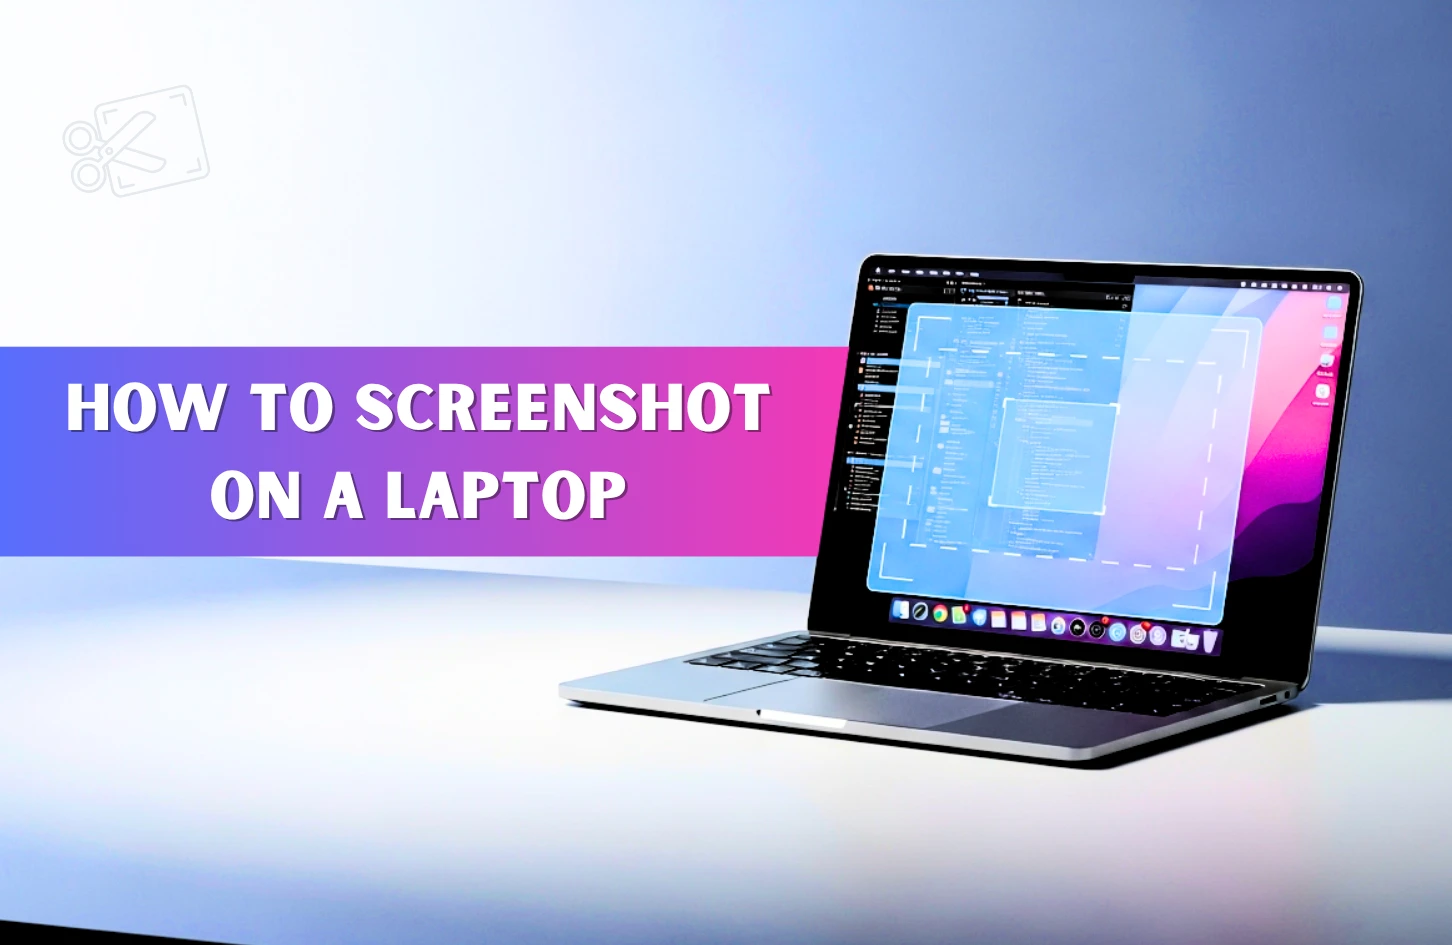
How To Screenshot On A Laptop
Suppose you’re watching something important on your laptop, maybe a lesson or a helpful walkthrough, and suddenly a key point shows up on the screen. You don’t want to miss it, and there’s no time to write it down. What do you do? A quick screenshot can save that moment in seconds. No matter if it’s notes, tips, or something you want to review later.
In this blog, we will walk you through simple and fast ways to capture anything on your screen whenever you need it, so you can instantly save your important info without missing a thing.
How to take a screenshot on your Windows laptop?
Here are a few of the simplest and most efficient methods you can try. Just pick the one that works best for you and start capturing your screen like a pro.
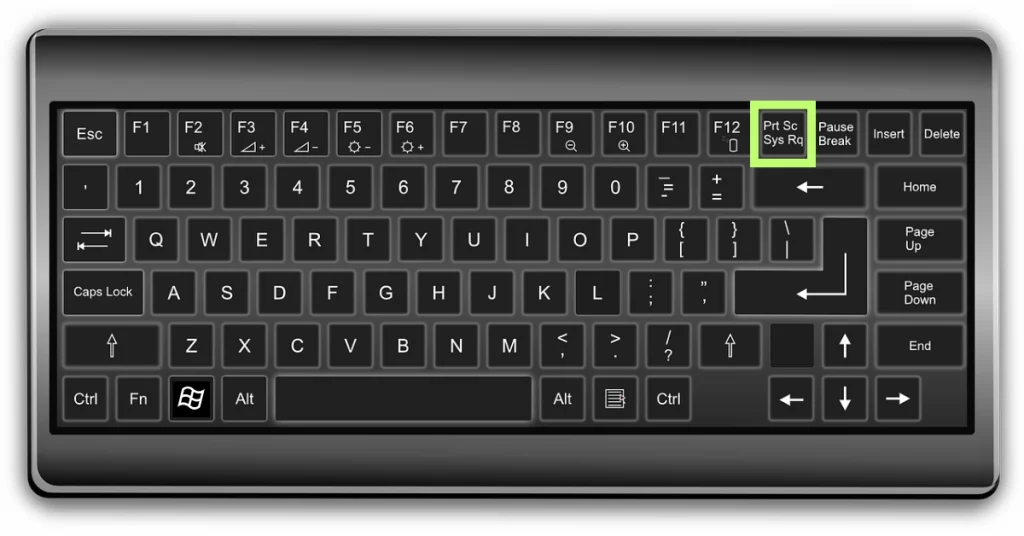
By pressing the Print Screen (PrtSc) button:
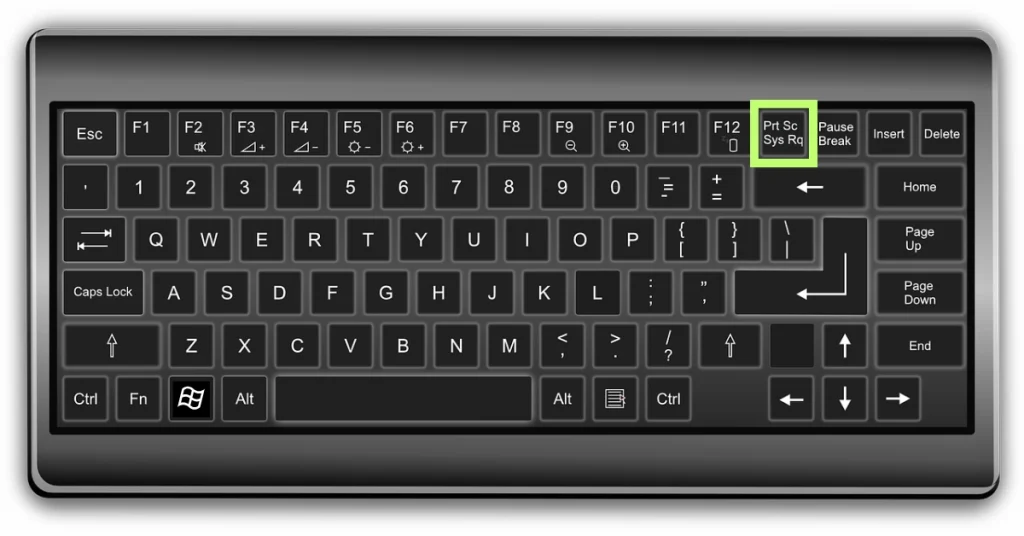
- Simply press the Print Screen (PrtSc) key or Alt + Print Screen ( depending on your PC )
- Click the Start button.
- Search for Paint and open it.
- Once Paint opens, click File and then click New to start a new project.
- Click Paste to add your screenshot to the new page.
- Now click File again and choose Save As.
- Give your file a name, choose a place to save it on your computer, and click Save.
Windows + Print Screen Shortcut:
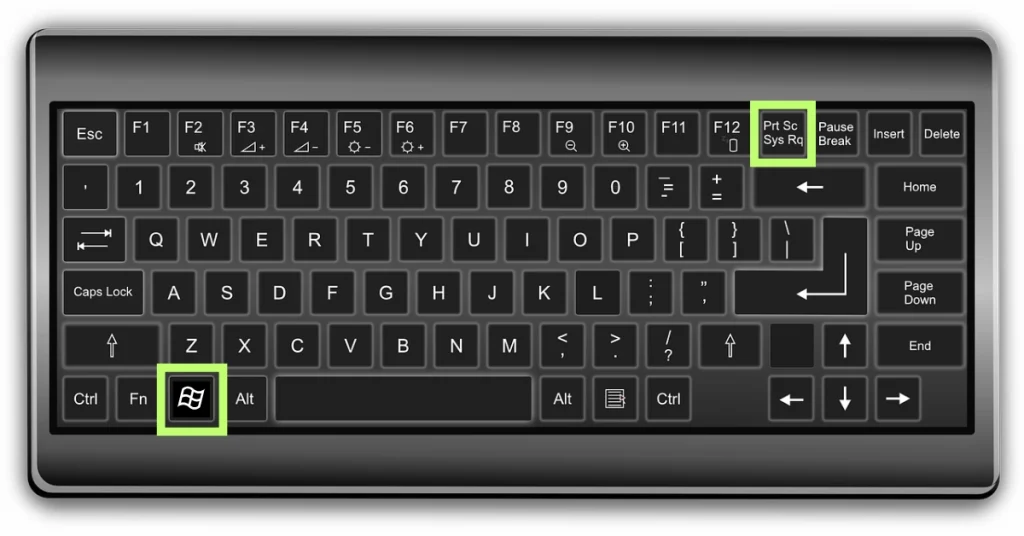
1. Press the Windows + PrtSc key together.
2. Your screen will quickly flash or dim for a second. That means the screenshot was taken.
3. Now, go to the pictures folder on your computer
4. Open the Screenshots folder inside it
5. You’ll find your screenshot saved there as a PNG image automatically
By using the Snipping Tool

- Click the Start button.
- Search for the Snipping Tool and open it.
- In the Snipping Tool window, click New to start capturing.
- Your mouse will change into a cross-shaped pointer.
- Simply click and drag your mouse to choose the area you want to screenshot.
- Once done, release the mouse or trackpad
- Now click File, then choose Save As.
- Give your screenshot a name, pick where you want to save it, and click save.
By using Snip & Sketch
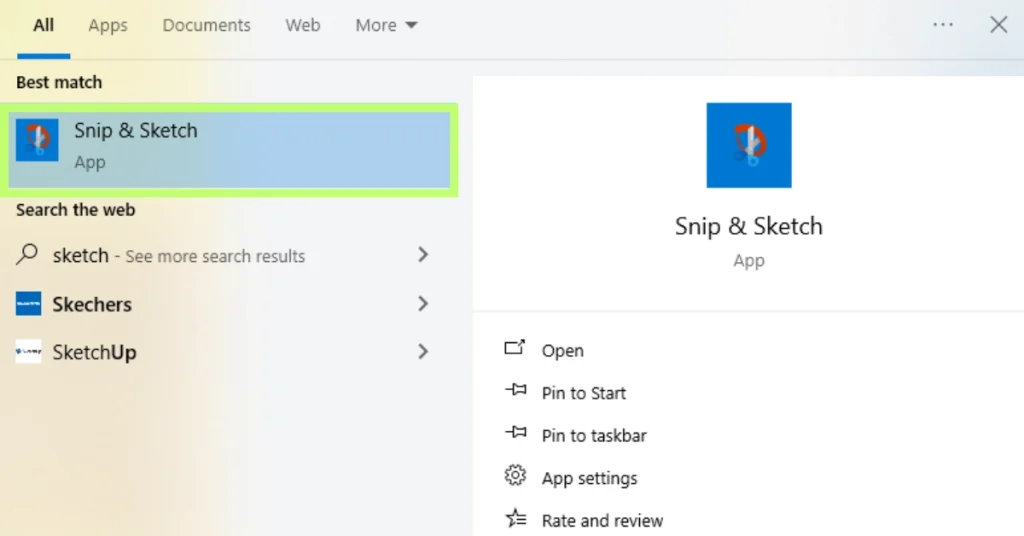
- Press Windows + Shift + S to start Snip & Sketch
- Your screen will dim and a small toolbar will show at the top
- Pick a snip type like Rectangular, Free-form, Window, or Full-screen
- Select the area or window you want to capture
- Click the pop-up that appears in the bottom-right corner
- Now Edit, save, or share your screenshot using the tools in the app
How to take a screenshot on your MacBook?
MacBooks make taking screenshots super simple. You can snap the full screen, a part of it, or just one window with easy shortcut keys. Below are some quick ways to take a screenshot on your Mac.
By pressing Shift + Command + 3:
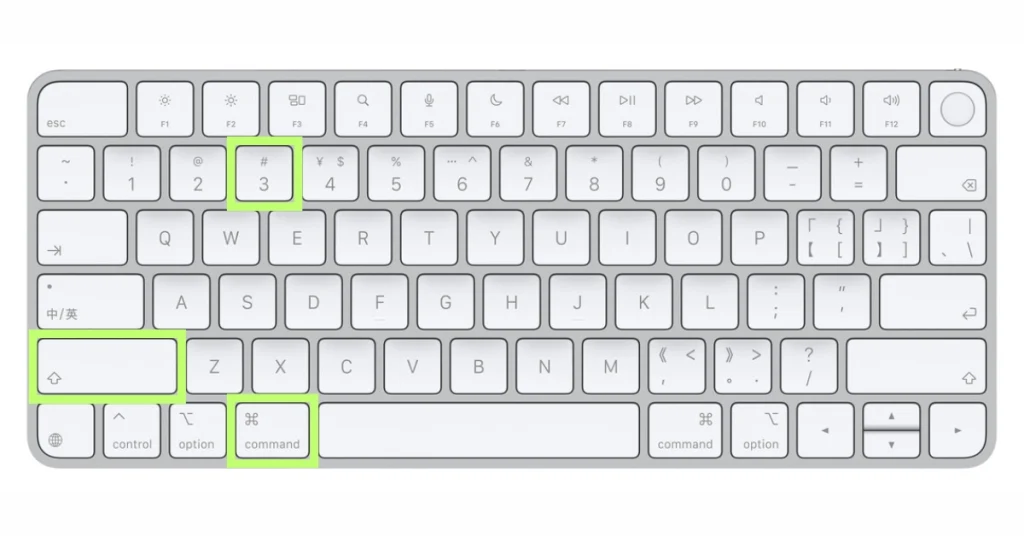
- Just Press Shift + Command + 3 on your Mac
- Your whole screen is captured instantly
- The screenshot is saved to your desktop automatically
- The file is named “Screenshot” with the date and time
- A thumbnail appears in the bottom-right corner
- Click the thumbnail to edit or mark up your screenshot
Press Shift + Command + 4 together to take a screenshot of a selected part of your screen
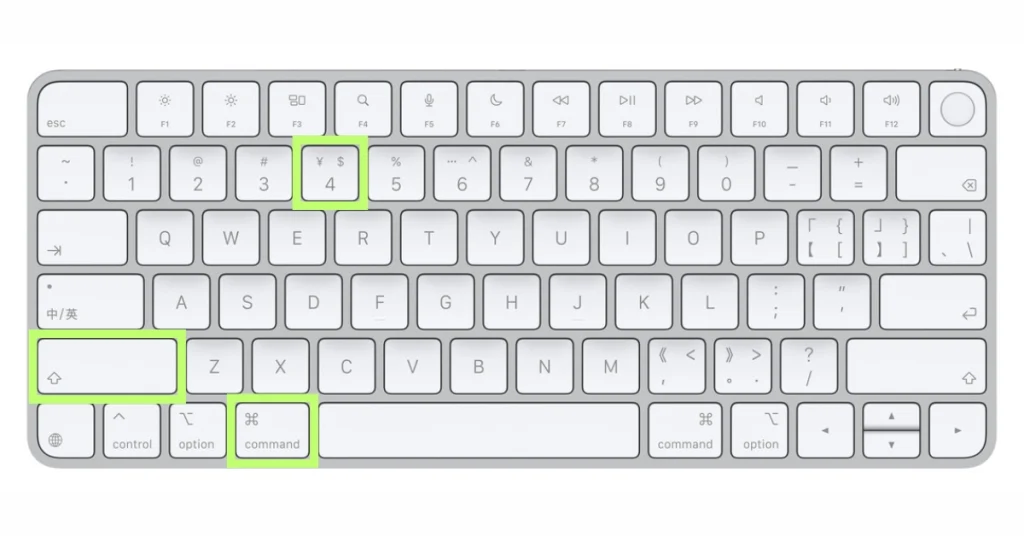
1. Press Shift + Command + 4 together to start taking a screenshot.
2. Your cursor will change to a crosshair shape.
3. Just click and drag to choose the area you want to capture.
4. To move the area you selected just hold the spacebar while you drag it.
5. To cancel, just press the Esc key.
6. After taking the screenshot, a small preview will appear at the bottom right corner. Click it if you want to edit before it saves to your desktop.
Press Shift + Command + 5 to bring up the screenshot toolbar.
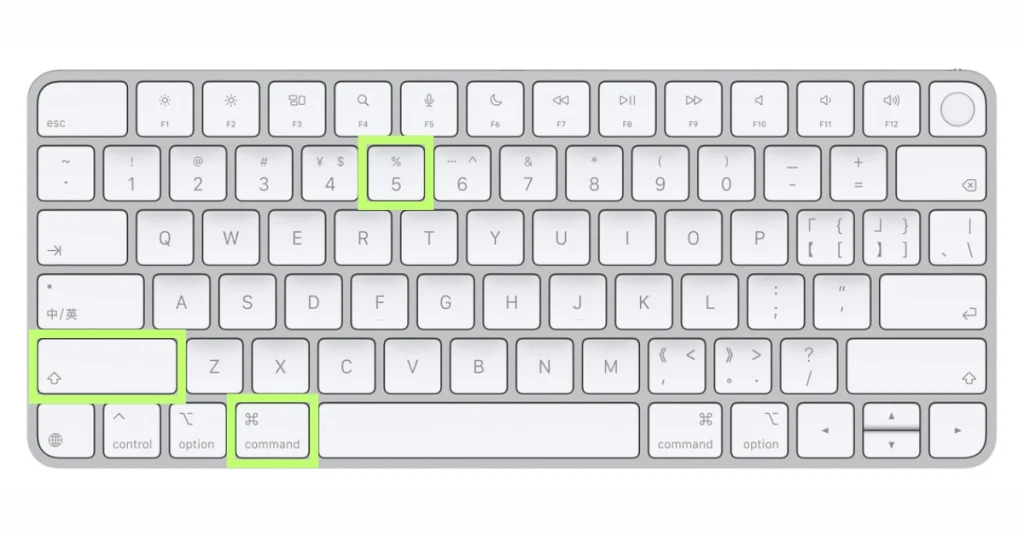
1. Press Shift Command + 5 to open the screenshot toolbar.
2. A small gray toolbar will show up at the bottom of your screen.
3. You can capture the entire screen, a chosen area, or a particular window.
4. You can also record the whole screen or just a selected portion of it.
5. Click the Options menu to choose where to save the file, set a timer, or use previous settings.
6. Once ready, click Capture to save the screenshot or start recording.
How to Take a Screenshot in Linux?
Honestly, taking a screenshot on Linux can feel a bit tricky since there’s no one built-in tool for all versions. Still, most Linux systems offer basic screenshot options, and you can easily add more if needed. Here are some easy and simple ways to take a screenshot on Linux:
Press PrtScn
1. Press the PrtScn key to take a screenshot of your whole screen.
2. Your screen will be saved as an image.
3. You can choose where to save the screenshot.
Press Alt + PrtScn
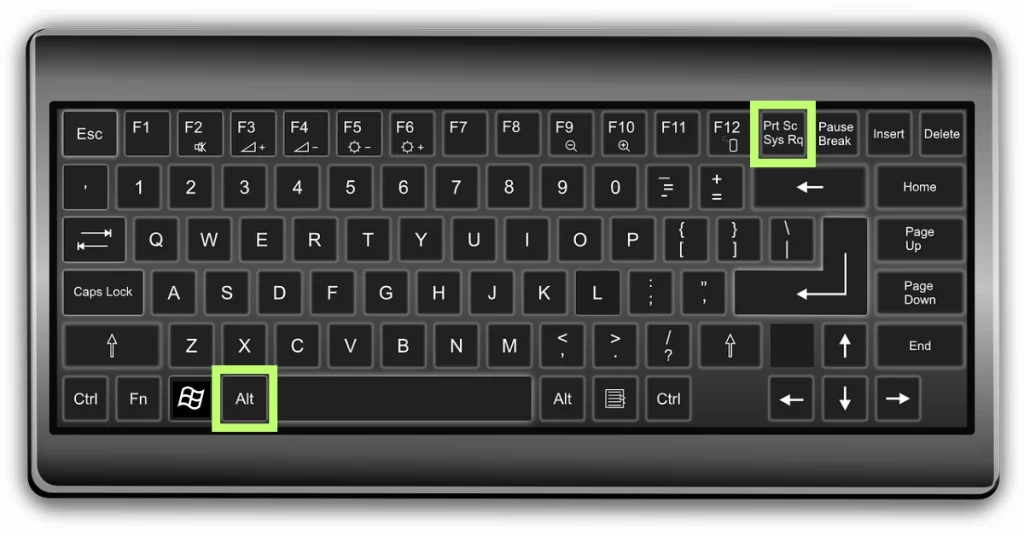
1. Simply press Alt and Print Screen together to capture only the active window.
2. The screenshot will be saved in your Pictures folder.
Press Shift + PrtScn
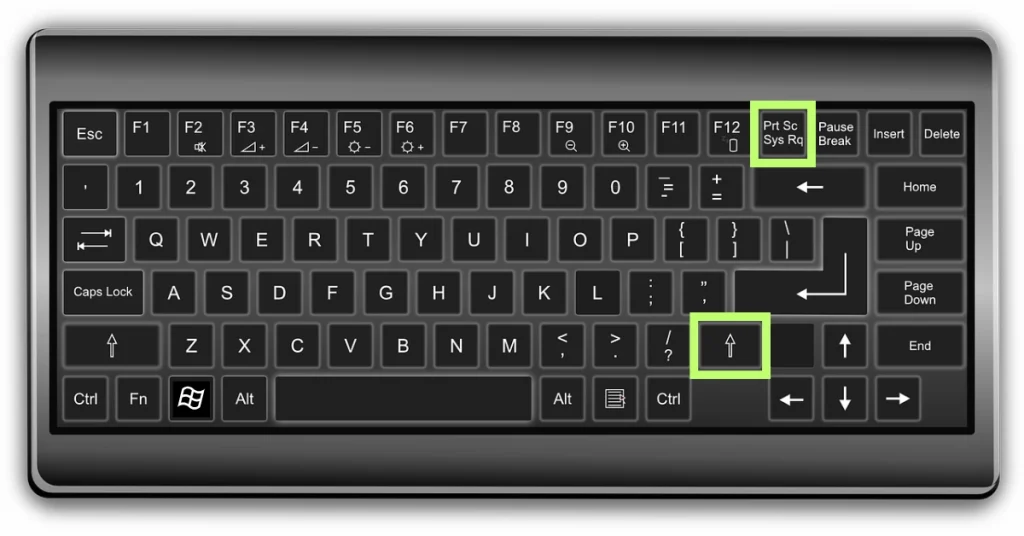
1. Press Shift + PrtSc together to start a custom screenshot.
2. Click and drag to select the part of the screen you want to capture.
3. The screenshot will be saved in your pictures folder.
In conclusion
In the end, I hope you learned how to take a screenshot in various and easy ways whether you’re using a Windows laptop, MacBook, or Linux system. From quick keyboard shortcuts to built-in tools, capturing your screen has never been simpler. Screenshots can save time and let you keep track of important moments instantly.
And if you’re planning to upgrade your device or need a reliable laptop that suits your daily needs, check out Vertech. We offer great laptop deals and expert support to help you find the right one.